 /
/ 
 EU
EU UK
UKSentriKey® Real Estate Website Guide
The SentriKey Real Estate website is exclusive to SentriLock users. You’ll find the site friendly and useful. This user guide describes many of the software functions regarding your lockbox. If you need additional support, please contact customer service.
Login
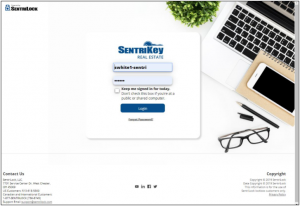
1. As a SentriLock user, you’ll be given a SentriKey® ID and password for logging in to the SentriKey® Real Estate website. To log in, go to https://lb.sentrilock.com/lbs/index/ and enter your SentriLock ID and password. Then click Login.
Note: If you’ve forgotten your password, see the Forgot Password? section of this user guide.
2. The Main Menu will be displayed:
Add a Listing
Before you can assign your lockbox to one of your listings, you must add the listing to your online account.
Note: Usually, your listings are imported by your MLS1.
1. On the Main Menu, click Listings:
2. Click on Add Listing on the top right.. The Add Listing screen will be displayed.
3. Enter the listing information into the required fields and click Add Listing.
5. You’ll receive a message on the bottom of the screen confirming that your listing information has been add.
Assign Your Lockbox to a Listing
When you assign a lockbox to a listing, other agents who want to show your listing can find the lockbox serial number (which they’ll need in order to open the lockbox) by looking up the MLS number or the street address of the listing. This is also an important part of the SentriLock system overall because the lockbox’s access log keeps track of who goes in and out of the listing to which it’s assigned.
1. On the Main Menu, click Lockboxes:
3. Use the Search Field drop-down menu to select Lockbox Serial Number.
4. Use the Search Type drop-down menu to select matches.
5. In the Search Value text box, enter the lockbox serial number. Then click Search.
6. Under Serial Number, click the serial number.
7. Your lockbox’s information will be displayed on the Edit Lockbox screen. To assign the lockbox to the listing, click Select:
8. The Listings screen will be displayed. Click the button next to the desired listing and click Submit Changes:
9. The Edit Lockbox screen will be displayed again, showing your listing. Click Save Changes:
10. The designated lockbox is now assigned to your listing. You’ll receive a message across the top of the Main Menu confirming that your lockbox information has been updated:
Assign a One Day Code to a Lockbox
If you’re a lockbox owner, or if you have privileges through a team or Broker-sharing, you can create a One Day Code. This code is used to open a lockbox and is ideal for use by other agents, homeowners, and contractors who need access to a listing but are not SentriLock members.
The code is active for the remainder of the day it’s created. Or, you can make the code active for a full day up to two weeks in advance.
Once the code is created, the code’s designated active time will be displayed.
If you’re a lockbox owner, you can generate a One Day Code on the SentriKey® Real Estate website.
1. On the Main Menu, click Add 1 Day Codes:
2. The Add 1 Day Codes screen will be displayed. To choose the listing for the lockbox, click Select:
3. The Select Lockbox screen will be displayed:
4. Click the button next to the desired listing and then click Submit Changes.
5. The lockbox’s serial number will be displayed:
6. Select the date that the code will be valid. Then click Generate Codes.
7. The Edit 1 Day Codes screen will be displayed. In the Assigned To text box, enter the name of the person(s) who will get the One Day Code. Then click Assign:
8. The One Day Code will be assigned to the designated person and is displayed:
9. Click Save Changes.
10. You’ll receive a message confirming that your One Day Code information has been updated:
View One Day Codes
Use the following instructions to search for and view One Day Codes that were generated for a lockbox you own or one for which you have ownership permission.
1. On the Main Menu, click View 1 Day Codes:
2. The One Day Codes screen will be displayed, showing your listings:
3. Under Date Valid, click the date of the desired listing.
4. Your One Day Codes for that listing on that date will be displayed:
Manage Your Account
There are several things you can do to manage your account; for example, you can change your password, update your cell number, change your email address, and add agents to your team. But if you’re unable to change or update any of your personal information, you must notify your Association to make the changes for you.
1. On the Main Menu, click on Your Profile in the upper right.
2. Click My Settings
3. Profile Settings is where you can manage your Cell Phone Number, your Email Address, and Linked Accounts.
4. Click on Account Settings. From here you can change your Password, change your PIN, add Agent Team members, set your default home view, view your Account Access Log, and view your Account Event Log.
5. To change your password, click Change Password. The Change Password screen will be displayed:
6. Enter your New Password; then enter it again to Confirm New Password. Remember, your password must contain at least six characters, one capital letter, and one number.
7. Click Save Changes.
8. To change your PIN, Click Change PIN:
9. The Change PIN screen will be displayed:
10. In the New PIN text box, enter your new PIN. Then enter it again in the Confirm new PIN text box. Click Save Changes.
11. You’ll receive a message saying the PIN has been successfully changed. You’ll also see a warning saying that your old PIN will remain in effect on your SentriCard® until the card is renewed in a reader.
Forgot Password/PIN?
You can reset your password on the SentriKey® Real Estate website.
1. Go to https://lb.sentrilock.com/lbs/index/ and click Forgot Password?
2. The Forgot Password screen will be displayed:
3. In the text box, enter your SentriCard® serial number or your SentriKey ID.
4. Click Send E-mail. You’ll see a message from the SentriKey® Real Estate website, telling you that a link to change your password has been sent to your email.
5. Click the link in the email.
Note: This link will expire in 24 hours.
6. The link will take you to the Change Password screen. Enter your new password, and then enter it again:
7. Click Save Changes. Your new password has been created and can be used to log in to the SentriKey® Real Estate website.
Message Center
The Message Center contains two types of messages: System Notices and Notification Messages.
System Notices remain in the Message Center until action is taken; for example, completing a Showing Survey.
Notification Messages are removed after they are viewed.
Once you’ve logged in to the SentriKey® Real Estate website, look for the mail icon on the upper-right corner:
If the box is blue, there are no unread messages in the Message Center.
If the box is red, you have unread messages and you’ll see the number of unread messages. Click the red box to see your messages.
Agent Team
The Agent Team function allows you to search for other agents within your Association by region, ID, team, and status. This function also allows you to add someone to your team.
1. On Main Menu, click on Your Profile on upper right corner:
2. Click on My Settings
3. Click on Account Settings
4. Use the Team Member Search Field to search for the agent you would like to add to your team.
5. Select the agent you would like to add from the drop down and click +
6. You’ll receive a message confirming your request for an addition to the Agent Team:
Note: The status remains Pending until the agent is added to your team accepts the invitation.
Live Support Online
The SentriKey® Real Estate website offers live support in case you have questions or encounter an issue.
1. On the Main Menu, click Live Support:
2. This screen will be displayed:
3. Read the SentriLock Chat Rules and the Chat Instructions.
4. Click the Live Support image.
5. The Live Chat screen will be displayed.
6. Click select department. On the drop-down list, click your department.
7. Enter your name and email.
8. Click Submit. A chat window will be displayed, and a support representative will respond.
Note: You’ll be asked for your SentriCard® number when you are connected to Live Support via Live Chat.
Grant SentriConnect® Access
If you’re an agent with a lockbox that is assigned to a listing, you can authorize someone to use the SentriConnect® mobile app in order to access your lockbox.
Your Association must have enabled SentriConnect®. Then you can use the SentriKey® Real Estate website to grant SentriConnect® access to, for example, a contractor so they can access your lockbox.
Note: In order for you to grant access, the lockbox firmware must be version 50.44 or higher and the lockbox must be assigned to a listing.
1. On the Main Menu, click SentriConnect®:
2. The SentriConnect® Access screen will be displayed:
3. At the top-left, click Grant SentriConnect® Access.
4. The SentriConnect® Access screen will be displayed:
5. In the SentriConnect® User’s Email text box, enter the user’s email address.
6. For the Lockbox, click Select.
7. The Select Lockbox screen will be displayed:
8. Click the button next to the desired lockbox and click Submit Changes.
9. The SentriConnect® Access screen will be displayed again, showing the selected lockbox serial number:
10. To designate the Start Time and End Time when access will be available, click each of the two calendars to select the start and end dates. Then use the drop-down menus to designate the start and end time when access will be available.
11. Click Grant Access. The user will receive an invitation to join SentriConnect®.
Access By Appointment (ABA)
Access by Appointment (ABA) requires REALTORS® to have an appointment in the SentriKey® Real Estate system to access a listing. ABA can be managed by using the SentriKey® Real Estate website or the SentriKey® Real Estate (SKRE) app.
When a listing is designated ABA, all access to that listing thereafter will require the listing agent to schedule an appointment for the access. When a listing is marked as ABA, only the listing agent can access the lockbox without an appointment. ABA is enabled on a listing basis not on a lockbox basis. Access to a listing with ABA enabled will only happen via the SentriKey® Real Estate mobile app. If a SentriLock user from a neighboring association has reciprocal access and would like to access your listing, they would simply use the SentriKey® Real Estate mobile app.
For ABA to work efficiently, Call Before Showing (CBS) can no longer be used at the lockbox. ABA is a more robust way of controlling secured access to listings. It provides members the enhanced sense of security that CBS does, along with the added benefits of seeing who has been given access. Plus, it has the ability to restrict access to specific start and end times.
Note: ABA cannot be enabled until the listing is assigned a lockbox.
This document describes how to enable ABA and how to change SentriLock settings.
Turning on ABA Using the SentriKey® Real Estate Website:
- Log in to the SentriKey® Real Estate website at www.sentrilock.com.
- Click the My Listings tab.
- In the Search Value field, enter the listing address and click Search. Or, use the scroll bar to find the listing, then click it.
- The Edit Listing screen will be displayed.
- Check the Enable Access by Appointment checkbox.
- Click Save Changes. This will enable ABA for this listing.